I first found out about self adhesive wallpaper on apartment therapy, since then I wanted to use that on my room. I searched high and low for the self adhesive wallpaper, it's available in Lazada and Rakuten. However, after I knew that it's sold for much cheaper price on Taobao, I lost the interest. Although it's much cheaper in Taobao, I think the shipping cost will make it not so cheap. So, the idea was left hanging.
Then, a new Mr DIY shop opened in my place, when I visited the store, I found out that they have wallpaper (non adhesive and self-adhesive type) and the price was quite reasonable. So, I googled to know the quality of Mr DIY wallpaper. It turns out that many Malaysians were buying wallpaper from Mr DIY to decorate their homes. Weird, when I used that search term "Malaysia Wallpaper", it only leads me to some online shops. But when I used the search term "Mr DIY Wallpaper", there were many reviews.
So, I decided to do a small project on top of my house cabinet, it is a plywood based cabinet. We put water pitcher and dish rack there, so, sometimes the water would seep into the top cover and after some time (more than 10 years), it started to crack open, it's unpleasant to look at, so that's my plan, to put the self-adhesive wallpaper on top of the cabinet.
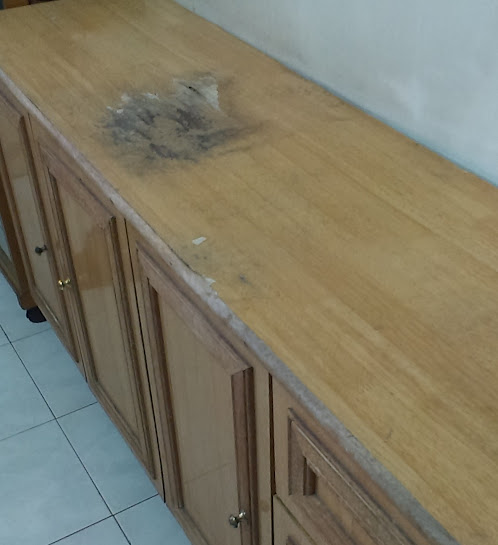 |
| Before |
The choices of wallpaper in Mr DIY was decent. There're various patterns and dimensions. Most came in the width of 45mm, for the length wise, ranging from 2m to 10m. I bought a 45mm x 2m wood patterned self-adhesive wallpaper for RM3.90. The non adhesive type was cheaper. But, for newbies like me, I think a self-adhesive type would help to bolster my confidence.
Anyway, right after I bought the wallpaper, I removed all the items on top of the cabinet and cleaned it. A clean surface will help things to adhere more securely. I make sure no dust was left on the surface and remove the wallpaper from the packaging. There's grid-lines on the backside of the wallpaper. Interesting, it helps on the accuracy of the cutting, I used scissors, so the grip-lines helped a lot.
The width was just slightly bigger then the cabinet width, so I decided to just wrap the edge with the excess wallpaper. For the length wise, the wallpaper was definitely longer than the length of the cabinet. So, after some adjustment, I just cut using the grid-lines as reference. On the backside of the wallpaper too, there's instruction on how to peel and stick the wallpaper, it should be done gradually, not peel off the whole piece at one shot, so holding the wallpaper at one side of the cabinet, I removed the sticker section by section. It's easy, after not more than five minutes, the top was covered. However, since the top of the cabinet was not flat, there's air bubbles underneath the wallpaper, I tried using a ruler to flatten it, but it's not so successful.
So I decided to leave the air bubbles alone, it's not so noticeable actually. Then the four corners of the cabinet, I should learn more on youtube before doing this, my cutting of the wallpaper was not so accurate, so the corners finishing didn't look good. Anyway, since it's adhesive type, I just pushed all the wallpaper in the corner to inside and it stuck. So, from afar, it looked quite good. Hahaha!
Below shows the "after" of the cabinet. I personally think that it's not bad. Hehehe! Can aim for bigger project, walls in my room!
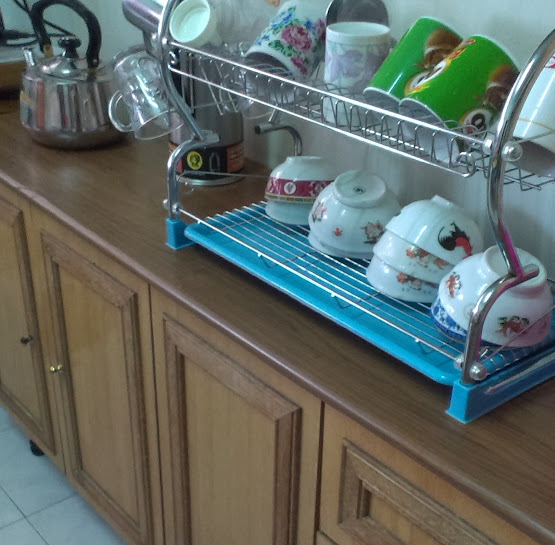 |
| after |
No comments:
Post a Comment