I have been thinking to buy some wallpaper to stick to my bedroom walls for a while, however, I kept procrastinating, finally, it's my mother who actually bought the wallpaper to re-decorate my little brother's room because the paint in his room was peeling like nobody's business. My room was in similar situation, but in smaller scale. Well, it was last painted more than 10 years ago, and since only the lower side was more serious, I think the peeling was due to the dampness in the room. And a fresh new coat of paint will not be helping the situation unless one is prepared to repair the wall (scrap the paint away, patch the holes, sand the wall to make it smoother), it is quite time consuming and expensive. So, wallpaper is the second best choice to stop the further paint peel off, just cover it up!
Apart from the ugliness of the wall, the peel off paint was a mess to clean too, the wall couldn't be scrub with, any force on the wall would cause the paint to further peel off and it's not very hygienic. Below shows the situation of the peel off.
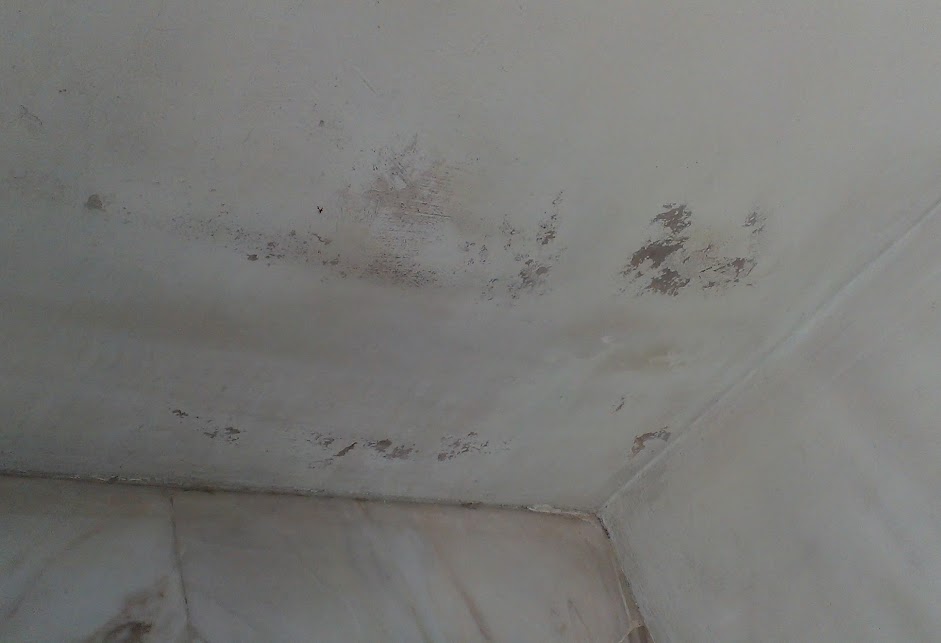 |
| Paint peel off |
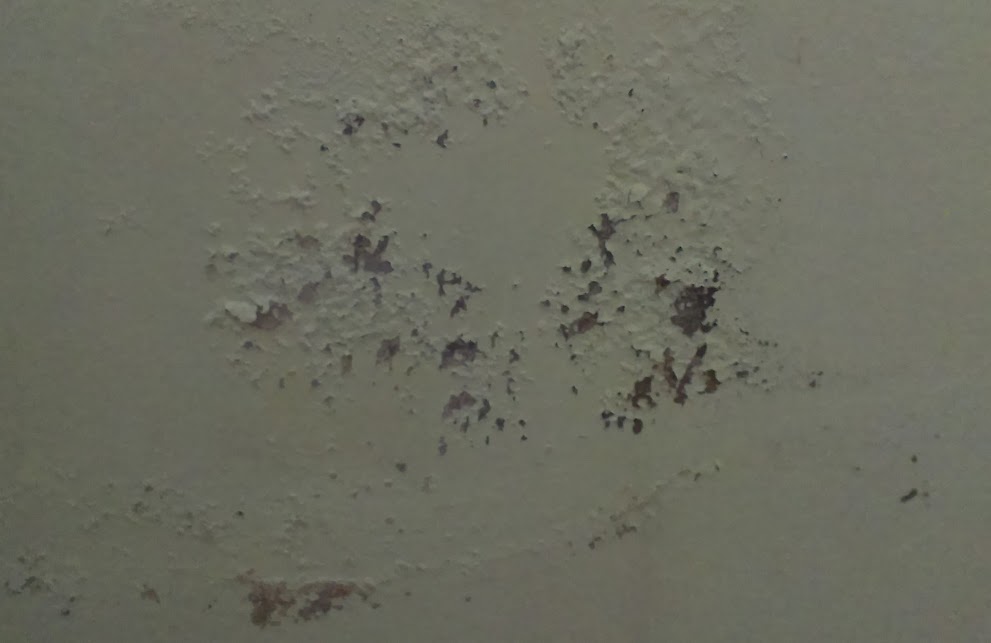 |
| Paint peel off |
I tagged along to buy the wallpaper in Mr DIY. When we went there this morning, we took some time to choose the design. Initially, my mom was interested in a light colour 65cm x 5m wallpaper, however, it's the only one left, definitely not enough. So, finally we chose the 45cm x 5m wallpaper with rose design because we could find 8 rolls of it, it's bad if half way through, no material to continue and left a half finished job, more is always better than insufficient.
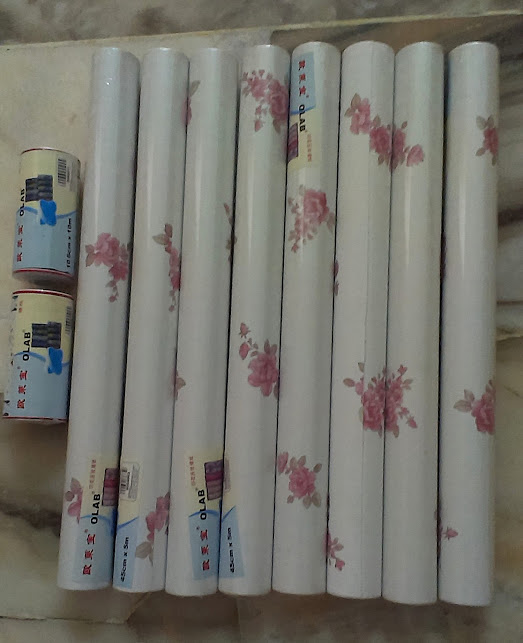 |
| Wallpaper from Mr DIY (8 rolls of 45cm x 5m wallpaper and 2 rolls of 10m sticker) |
Well, after we bought the wallpaper, me and my brother cleaned the wall first, well, luckily the furniture in my brother's room was not heavy, we didn't even take out the table and racks, just changed the position as needed. The height of the room was quite high, so we decided to just cover up the paint peel off area. So, instead of sticking the wallpaper vertically, we stuck it horizontally.
The most difficult part was the first step, need to find the feeling first before started the job. After that, it's ok and fast. Like what my friend discovered about her home when installing the wallpaper at her home, I found the same issue, the house was not level. Initially, we planned to stick the wallpaper continuously for 5m without cutting, however, since it's not flat, we have to stick it wall by wall, or else some lower wall area would be left exposed to the environment. Although the demonstration video from youtube seems easy, it was actually not that easy.
We kept re-adjust the wallpaper after sticking because there's some air pocket left, have to peel it off and re-stick it. However, after we got the hang of it, we didn't have to re-do so many times. I think this was a two person job, one person to adjust the wallpaper and pressed it to the wall and another person to peel off the sticker.
We kept re-adjust the wallpaper after sticking because there's some air pocket left, have to peel it off and re-stick it. However, after we got the hang of it, we didn't have to re-do so many times. I think this was a two person job, one person to adjust the wallpaper and pressed it to the wall and another person to peel off the sticker.
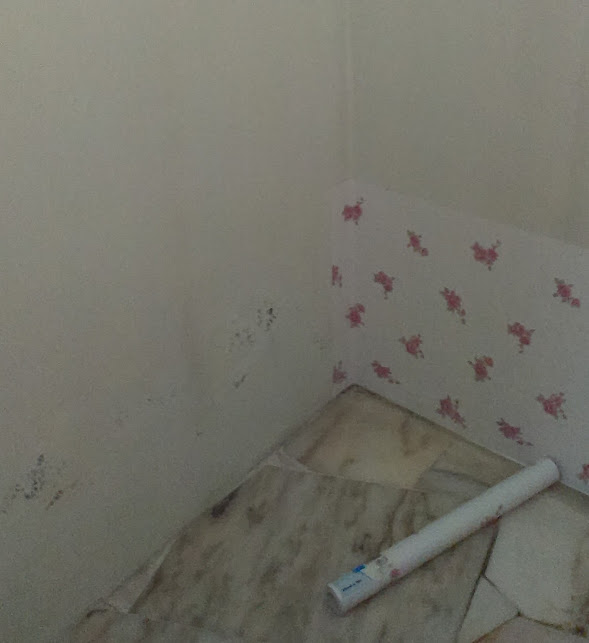 |
| Half way through the job |
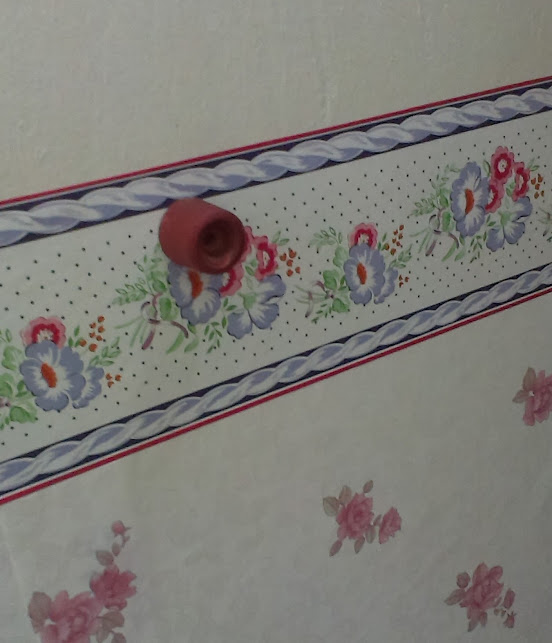
Since 45cm was quite short, we used two, the other one just above the lower wallpaper. To avoid headache, just make sure the second wallpaper is overlapped to the first wallpaper edge. It's easier and no worry there's a gap between the two wallpaper. After finished sticking the rose pattern wallpaper, around 80cm to 90cum of the wall was covered, however, it looked weird. After that, we stuck the shorter sticker above the wallpaper. For this, we had to cut it part by part due to the unevenness of the wall. Although we budgeted by overlapped it with the lower wallpaper, still some gap was left between the wallpaper and the sticker. Luckily, the cutting was not so obvious from afar.
The lower part of the wall was free from anything, however, there's one wall protector for the door knob on one side of the wall. So, have to remove the wall protector with screw driver first, then stuck the sticker, made a hole and re-screw the wall protector back. Not difficult, but if we decided to stick the wallpaper to the whole wall, we needed to take out the socket cover, a little bit more steps.
Finally, the outcome of the 3 hour job, most of the time was used to clean actually. Hahaha! We used four and a half rolls of the 45cm x 5m wallpaper and full one roll and 1m of the second roll of the 10m sticker. So, the total cost was around RM40, not counting our labour cost.
 |
| trickier part of the job |
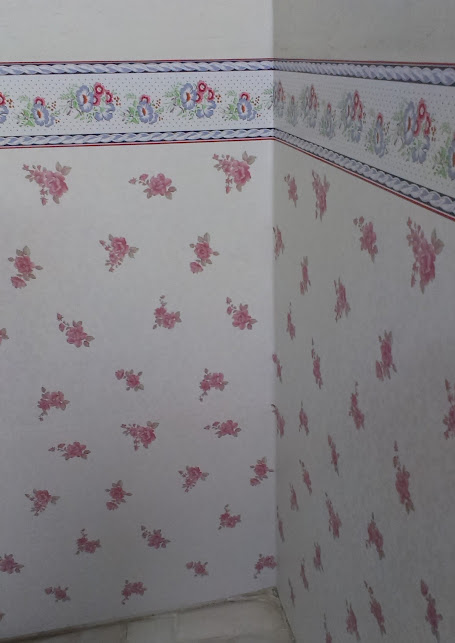 |
| Finished job |
Thanks for the info. Planning to get my dining wall done.
ReplyDeletehttps://www.letsknowit.com/wallpapre
ReplyDeletehttps://medium.com/@dubaitechnician786/expert-wallpaper-installation-services-in-dubai-045864033-c56154fb9af9
https://588880054183.gumroad.com/p/best-wallpaper-fixing-dubai-045864033
https://www.linkedin.com/pulse/best-wallpaper-repair-dubai-045864033-iphone-repair-dubai/?published=t
https://588880054183.gumroad.com/p/best-wallpaper-fixing-dubai-045864033