After much procrastination, finally I decided to buy the wallpaper and redo my room. However, for the first few times I went to Mr DIY, I couldn't get the desired quantity of the wallpaper I needed. It's always a few rolls of particular design only. When I asked the staff, the only reply was "There's no stock in the store room, the one on display is all the available stocks!" To be fair, the display of wallpaper in the shop was getting more and more tidy. I guessed I went to the Mr DIY the wrong time, I should choose to go on the day they restock their inventory.
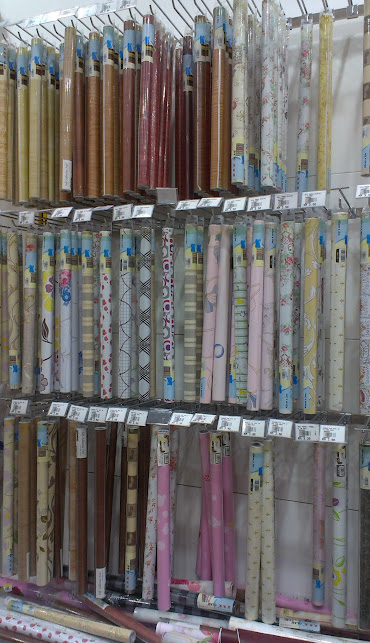 |
| wallpaper rolls in Mr DIY |
Anyway, I got the quantity I needed on December 2015. I think I bought around 20 rolls of 5m wallpaper of same design. I chose that design due to the fact it's the only one with the most quantity. I think I took it all. Then, on a long weekend, that Friday was a public holiday. I started my project. The first thing was to clear all the furnitures in the room. However, it was too much. So, I just removed the mattress and the bed beam from the bed frame, for the cupboard and study table, I just moved it around as needed.
Then, cleaning time. First, I took care of the spider web, then I scrubbed the wall and cleaned the floor. It took almost half a day. I did all the cleaning by myself. However, to stick the wallpaper, I engaged my family members to help me. Although it's a self-adhesive wallpaper, it's very difficult to stick it straight from the top of the ceiling to the floor. After I failed to get it right for a few times myself, I just called my brother to help positioned the wallpaper near the floor while I stood on the ladder and adjusted it on the ceiling edge.
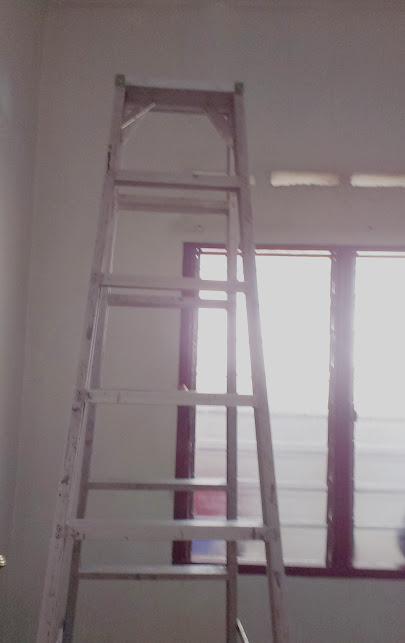 |
| ladders needed to clean the spider web |
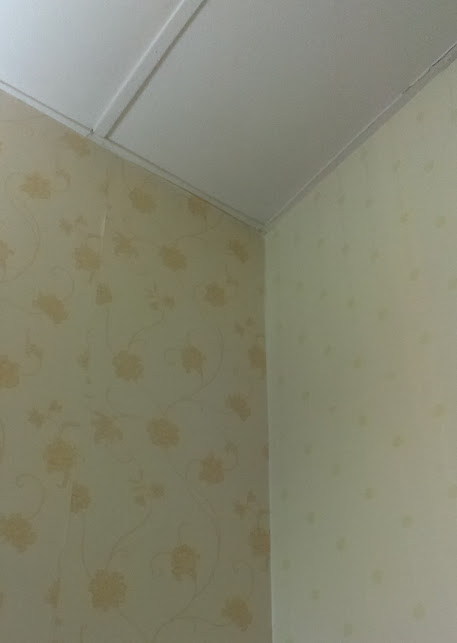
Well, me and my brother used the rest of the afternoon to finish up two sides of the wall. It's getting late, so I decided to continued the next day and moved back the mattress into my room. I noticed the remaining wallpaper might not be enough to cover the whole room. So, I rushed to the Mr DIY to buy more wallpaper. However, the design I had was out of stock. So, I looked for other wallpapers that matched my first purchase.
 |
| first side of the wall covered with wallpaper |
For the second purchase, I chose a similar colour design.
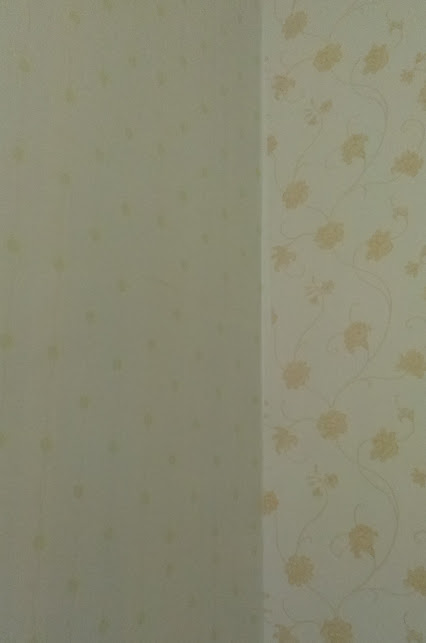 |
| two different designs on two sides of the walls |
 |
| two different designs on two sides of the walls |
The next day, I continued with the work. Again, I needed too move the furniture around. But, second time around, the work became easier. For the socket area, I didn't remove the cover, just cut and paste around the socket cover. For the lighting fixture, my father helped to remove the fluorescent light holder and after the wallpaper was stuck, he installed the fluorescent light holder back.
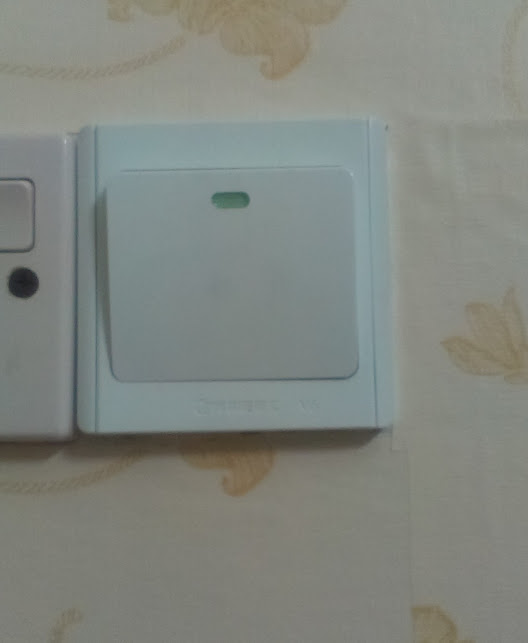 |
| socket area |
When I stuck the wallpaper, I didn't care whether the pattern matches or not, I only make sure that no gap left. So, if one looks near enough, he or she will find out that there's no continuity on the pattern. I am OK with this, so no problem. (Although I felt that the wallpaper I purchased later was much easier to match because the pattern was kind of straight, even if I missed a lot, the differences between two wallpaper wouldn't be so noticeable!)
After two days of hard work, finally my room was (is) covered with wallpaper. For this, I spent around RM200, not so expensive, but painting might be cheaper if not counting the manpower cost. Anyway, I am enjoying the new view of my room now!
No comments:
Post a Comment